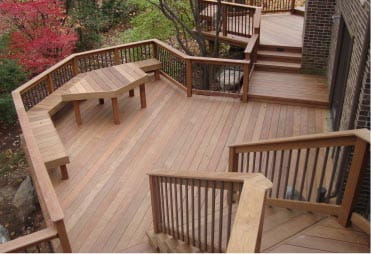
7 THINGS TO ENSURE IT STAYS STRONG
Make your deck building project go faster. Here are seven simple steps from the pros.
Quick and clever tricks like these allow professional builders to build a deck quickly and accurately. Building decks is not for everyone. If you are doing something simple, move ahead, follow the steps. If you are looking at a magnificent one, talk to the experts.
Step 1: Simplify joist hanging
Construct a simple jig, with a 5 x 12-in. piece of plywood and a scrap 2×4 cut to the width of your joists. With the joist hanger around the 2×4, nail it into the ledger board through all the holes. This is the easiest way to get the deck joists. Ensure as you set your joists to chisel out a notch on the bottom, if the joist sits too high or shim it if it’s too low.
Step 2: Accurate notching
Now, that the joist is hanging, you need nail the notching. The most precise way to cut a deck board around a post is to position it against the post and mark the post location directly onto it. While measuring the depth of the notch, check for both sides of the post. Often a twist in the post will cause measuring issues. Now using a jigsaw, cut out the notch.
Step 3: Space balusters with a jig
Start working from the center of the rail and move toward the ends. Space each baluster with a jig. Support the ends of the balusters with a 1-inch-thick board. Through the stinger with 3-inch deck screws, screw in the balusters.
Step 4: Hanging stronger stair stringers
Of the half-dozen deck stair hanging methods I’ve tried for 2×8 framing, this method works the best. Cut the 2×12 stringers extra-long and secure them to blocking between the joists or to the joists themselves if they run parallel to the stringers. If possible, set your stair rise to 7-1/4 in. and tread to 11 in. (two 2x6s). Always leave a minimum of 3-1/2 in. of wood perpendicular to the back of the stringer and the deepest cutout.
Step 5: Straighten a bowed deck board
Set the board, bow in, and nail one end. Work toward the other end, nailing as you go.
No matter how good your lumber supplier, a good share of your decking is sure to be bowed. Straightening bowed boards is a routine part of deck construction.
Step 6: Trim deck boards dead straight
Beauty is in the details. Using a board to guide your saw as you trim your decking leaves an edge crisper than the steadiest hand can make. Set your guide board up as shown. If you use a 2×2 like we did, sight down it from one end to make sure you get it perfectly straight. You’ll have to cut the last two boards off freehand. Mark the entire cut with a chalk line and keep your saw going in a straight, steady motion.
Step 7: Craft a beveled post cap
Placing a cap over your rail posts not only looks good but also protects the vulnerable end grain of the post from the weather. Caps for 6x6s usually must be special-ordered, but you can make your own from 2×10 material and save the wait and money. This jig is made from 16-in. pieces of 2×8 framing and 1/2-in. plywood (see illustration). Setting the plywood guide on the jig to your circular saw requires some trial and error. Adjust it so the blade leaves a slight reveal on the top of the cap. Secure the cap to the posts with construction adhesive and 3-in. galvanized finish nails.

